


Well here I am reveling my secret! it's pretty simple!

Once you know the design you're making, you can cut all the marshmallow pieces and have them ready to cover with sugar individually, or you can assemble your character, and then add the sugar....it is really up to you.
In this Tutorial, I am just showing you how to make the Sugar Crystals stick to the marshmallows.

You'll need:
- Marshmallows (either cut into the shapes you need) or assemble. Please check my other Mallow tricks Tutorials Here, to learn how to cut and assemble Marshmallows.
- Sugar Crystals (store bought or home made-I'll share in another tutorial how to make your own sugar crystals)
- Water
- Paint Brushes


Take your Marshmallow (cut or your character already assemble)
In this Tutorial, I am using a whole Jumbo Marshmallow.
Dip your paint brush in the water....

...and just like painting...."paint" with water the whole Marshmallow (whatever you want covered with sugar crystals should be covered with water.

Tip: Do not over do it.... it does not have to be damped in water. Dip the brush into water, and use a piece of paper towel to discharge the excess water.

Once the marshmallow is all covered evenly with water (not dripping water) you can rolled in the sugar container....

...or you can pour the sugar crystals in a plate (this is how I do it)

I dip in the bottom of the Marshmallow in the sugar

then... turn it over to cover the rest of the Marshmallow

and to prevent a big mess, and to avoid getting sugar stick all over yourself, use a spoon to cover the rest.

Be generous with the sugar...if you want the Marshmallow to be covered evenly

and voila!!!

there you have it....a delicious and sugar covered marshmallow.
Let it dry for at least 1 hour.
You can do as many colors as you want!!!
Here are some examples of the things you can do with this technique.

the wings of the butterfly have been decorated with sugar Crystals, I first did the centers of the wings, covered with pink sugar, and after they dried, I did the borders with purple sugar Crystals

The center of this flower was decorated with Sugar crystals using this technique, after if was dried, I decorated the border with royal icing.
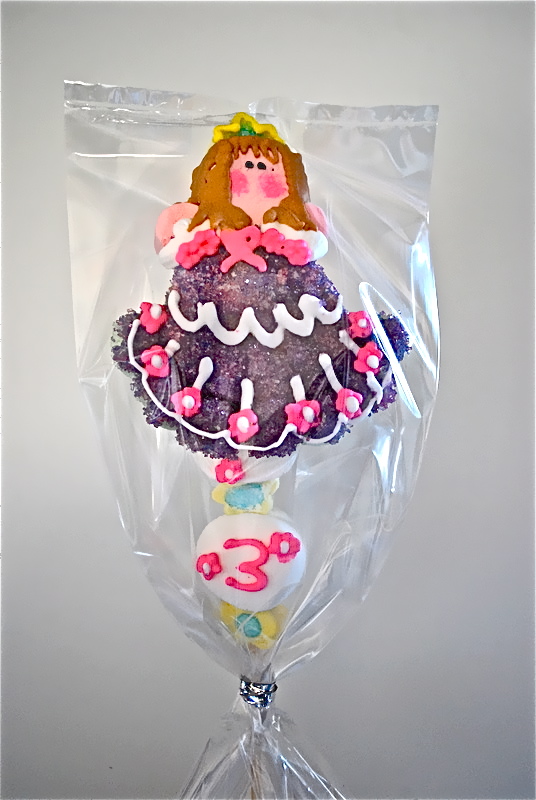
After this princess Characeter was assembled, I decorated the dress with sugar Crystals, using this technique. After it dries, I add the sugar decorations (royal icing, candy or fondant)

The Body and the shoes of this clown was decorated using this technique. I assembled the whole character, without the shoes. I decorated the body with the the Red Sugar Crystals, and separately I did the same with shoes. Once they were all dried, I added the shoes, glueing them with royal icing.

This whole Elmo was decorated using this technique. I assembled it first, and the added the sugar, and at last the details with royal icing, and mini marshmallows.

the body of this rooster was decorated with white/clear coarse sugar crystals, to add texture to the rooster's body.

The ears and body of this cute mouse was decorated with white/clear sugar crystals...after I added color to the marshmallows, and assembled it. How to add color to marshmallows will be my next Tutorial!
I hope you have enjoyed it!!


Thank you!!! It was a very helpful tutorial!!! Can't wait to try it!!
ReplyDelete